This blog is about RC airplanes, drones, FPV and RC pilots.
If you like it, you can help me grow my blog and channel and improve my tools for making videos. Just use my affiliate program at Banggood,at no extra cost to you: ►https://goo.gl/fpFjTJ
Showing posts with label Reviews and flight. Show all posts
Showing posts with label Reviews and flight. Show all posts
We all solder from time to time, various connectors for battery, ESC, motors.... I have used several soldering irons, and was not happy with all of them. So friend of mine has recommended me TS100, I have watched for it and finally purchased the upgraded version.
So what is upgraded version ? Well, all information that I could find is that it comes with sharper soldering tip, new firmware and that it is in brown color.
Never mind for that, I have ordered it and it is here. Comes really nicely packed in the box, with soldering tip in separate packing than the handle itself.
And the handle is the brain of this iron.
Let's run through some specifications first and product description:
Based on 304 stainless steel nested polycarbonate housing, integration of safety circuit design power supply interface, anti-static structure, embedded STM32 processor chip, dual temperature sensor and acceleration extreme cooperate, TS100 intelligent temperature control between 100-400 degrees, instantaneous heating, automatic dormancy, overtemperature alarm, and other functions.
External independent power supply : DC5525 power interface, suitable for notebook DC12-24V power supply, car power and mobile power supply.
Micro USB interface: Through edit the parameter file, custom your own temperature curve and buttons function.
Additional features: Open source for writting your own App. (I don't know what I would do with that)
Temperature rising / falling are just achieved with a finger.
Sleep mode effectively prevents dry heating. Prolong the life of soldering tip. Save more electricity.
When the temperature exceeds preset highest working temperature, it will be on alert and OLED displays: Warning!
Antistatic structure with ground wire connected that makes you safe every working time.
Temperature display and temperature control key built on the handle, operate become more freedom.
Embedded universal interface DC 5525, perfect details shows our strength.
Resisting to high temperature oxidation.
DC 5525 power port be compatible with DC12-24V laptop AC adapter/Power bank/Car power.
Design your own temperature-rising curves.
And what is it why this soldering iron is so good. Well, it heats up really quick, I used power supply from my laptop, you can use any DC power supply from 12V to 24V. Also, it so lightweight and easy to use. One of the benefits is that you can make yourself or jus buy LiPo adapter cable and use standard LiPo battery as power source on the field. Anything from 3S to 5S is good enough.
There are only 2 buttons on the handle, if you want to change temperature, just long press one of them and then change the required temperature. Internal accelerator chip monitors your work, and if you put away your soldering iron, it goes to Idle mode (loweting the temperature for 100 degrees) until you use it again. heating from room temperature to 300 degrees Celsius takes only 10 seconds !! Excellent.
If you forget to turn off your iron, it will turn off by itself after some peroiod of time (or go to Sleep). All these values are configurable via the menu on handle itself (described in the video below).
There are a lot of soldering tips available to purchase, you can purchase single ones or pack of 7 different ones, check the links below.
Anyway, take a look at my video review, I am very satisfied with this soldering iron, and I would recommend it to anybody.
My second scratch built balsawood plane. This is actually a slope glider, but I made it as an electric glider. Excellent flyer.
Link to plans: https://aerofred.com/details.php?image_id=96129
I received two charging boards from AKK, one for 1S batteries and one for 3-4S batteries.
So let's start with 1S board. This one is for all those pilots that fly micro types of aircrafts powerwd by 1S battery. Board itself has 5 independent ports with Micro JST 1.25 and JST-PH 2.0 connectors. And I received additional 5 pieces of JST-PH 2.0 male to Micro Losi female and JST female cable adapters, which cover all types of 1S battery connectors available on the market.
Regarding power supply, you have 2 options. You can use standard USB to micro USB cable or charger from your mobile phone to power this board or any 2-6S LiPo battery with XT60 connector. That is really handy if you want to charge your batteries on the flying field.
If you use USB cable or mobile phone charger, be sure that it can provide at least 2A of charging current.
Another great feature is that for each channel you have switch for changing the charging current from 200mA to 500mA. All channels are set to 200mA by default, and I would suggest that you charge your small capacity batteries (up to 500mAh) with that current. Batteries over 500mAh capacity can be charged with 500mA .current.
There is also one blue LED for each channel, which will be turned on when you connect the battery, and turn fully off when battery has ben charged.
Second board on my review is XT60 parallel charging board for 3-4S batteries.
You will need charger for this one, and this one requires that you charge batteries with the same capacity and cell count as all of the similar boards on the market.
But, as allways with AKK, they have added something that other boards do not have. First are the fuses between all XT60 connectors. Why is that needed? Well, some hobbysts (like myself) often solder their battery connectors by themselves. and if at some occasion someone reversed polarity...that is where fuse comes in, it will prevent short circuits and battery damage or fire. Excellent safety issue.
Second is small LED display, which displays voltage for every cell and total voltage of the battery.
Two new micro AIO cameras have arrived on test . I can't keep up with these guys, they are publishing new products weekly now.
I am going to start with AKK A3-OSD
It is integrated all in one solution which means that camera, video transmitter (VTX) and antenna are joined together in one device.
These little systems are so versatile, you can put them anywhere.
Primary, they are meant for micro quads like Tiny Whoop or Inductrix, but actually , you can use them on anything related to RC: cars, helicopters, airplanes...
Let's run through specifications first.
Input voltage: 3.3V - 5.5V Operating current: 300 mA (at 25 mW output) Antenna connector: dipole Video Format: NTSC 600 TVL Lenses: 120° FOV Frequency: 5.8 GHz, 6 bands, 48 channels Output power: 0.1mW / 25mW / 200mW Weight (measured): 4.57 g Dimensions: 18 mm x 13 mm OSD: Call-Sign, CH, Band ,FR, voltage and flight time
So, the easiest way to power this little thing is by using 1S battery. There is battery adapter provided with the unit for different battery connectors.
Big surprise is OSD. You can type in your Call-sign and all necessary data is visible like band, channel, frequency and power output.
All settings are done with single button and 2 LED lights.
And what can I say about this one. Well I like it. I like it a lot. With its 200 mW of output power and versatility plus OSD this is my favorite.
Previously I have tested AKK A5 AIO which is split system without OSD and with maximum power of 25mW, and with that system i got around 700m range with clear picture.
Since this one has 200 mW output power, range will be much bigger, I assume over 1 km.
That is a lot for such small device.
Battery consumption depends on your power output, and with 150 mAh 1S battery and 200 mW output, you can have around 5-6 minutes of picture.
It looks almost similar to A3-OSD but with additional cable connector.
And that SA stands for Smart Audio. That means that you can setup all parameters via BetaFlight OSD in your micro or mini quad and use special PitStop mode (0.01 mW output). Of course, you can setup this camera with single button on camera and 5 red LEDs and 2 blue LEDs.
There is a loop yellow cable on that additional connector which allows you to insert your own OSD in between.
Let's run through specifications:
Input voltage: 3.3V - 5.5V Operating current: 300 mA - 480 mA Antenna connector: dipole Frequency: 5.8 GHz, 5 bands, 40 channels Output power: 0.01mW / 25mW / 50 mW / 100 mW / 200mW Weight (measured): 5.25 g Dimensions: 18 mm x 14 mm
You can see whole review and setup in video below.
And my final thoughts.
I like both of them, but my favorite is A3-OSD since I fly mostly planes and that little thing has everything that I need: good stable picture, good range, versatility and extra integrated OSD.
Good job AKK
There are many FPF VTX systems on the market these days and AKK keeps making new products almost every two weeks. This time, I have tested their new FX2 40CH switchable VTX. So let's start with specifications first:
As all new AKK video transmitters lately, this one also has Smart Audio port which allows you to change channel band and frequency and even power output via your BetaFlight OSD controller. PitStop mode is also present (that mode transmits with very low power output ,around 0.1mW, and if you accidentally enter channel that someone is using at that moment on the race track, he won't loose his picture because of that very low output). Antenna connector is MMCX and in the package there is MMCX to SMA cable, so you can use your existing antennas with this VTX and place it anywhere you find appropriate on your drone, plane...
Setting up band, channels and power output is very easy with one button, and is described in video below.
Time to test picture quality and range. As always, I am using Eachine EV800D googles (Link on Banggood) with standard antennas, so nothing special and pricey.
It was -1 °C that day in Croatia, with very cold wind...I was thinking of making range test, but at 2.5 km range, my fingers froze, and I had to return back. Anyway, at that range I had no issues with picture as you can see in video footage. Perfectly clean picture. Nice job AKK.
I have received 2 new VTX from AKK Technology.
First one is AKK Nano2, small and lightweight video transmitter for your micro and nano flying vehicles (like Tiny Whoop, Inductrix, E-Flite UMX series...).
Key features:
Support 0.01mW Parameter-adjusting Mode
25mW, 50mW, 100mW and 200mW power switchable
One button frequency and power setup
OSD configuration using FC Uart (F3/F4/F7 with OSD)
5V to camera @ under 300mA
Second is AKK FX2.
This one has output up to 800 mW.
AKK FX2 5.8Ghz 40CH 25mW/200mW/500mW/800mW Switchable FPV Transmitter support OSD (configuring via betaflight flight control board)
Key features:
Support Parameter-adjusting mode
25mW, 200mW, 500mW and 800mW power switchable
One button frequency and power setup
OSD configuration using FC Uart
7-24V input with 5V output
With MIC
This is ARF kit and demands some knowlege and a lot of patience.
So let's start.
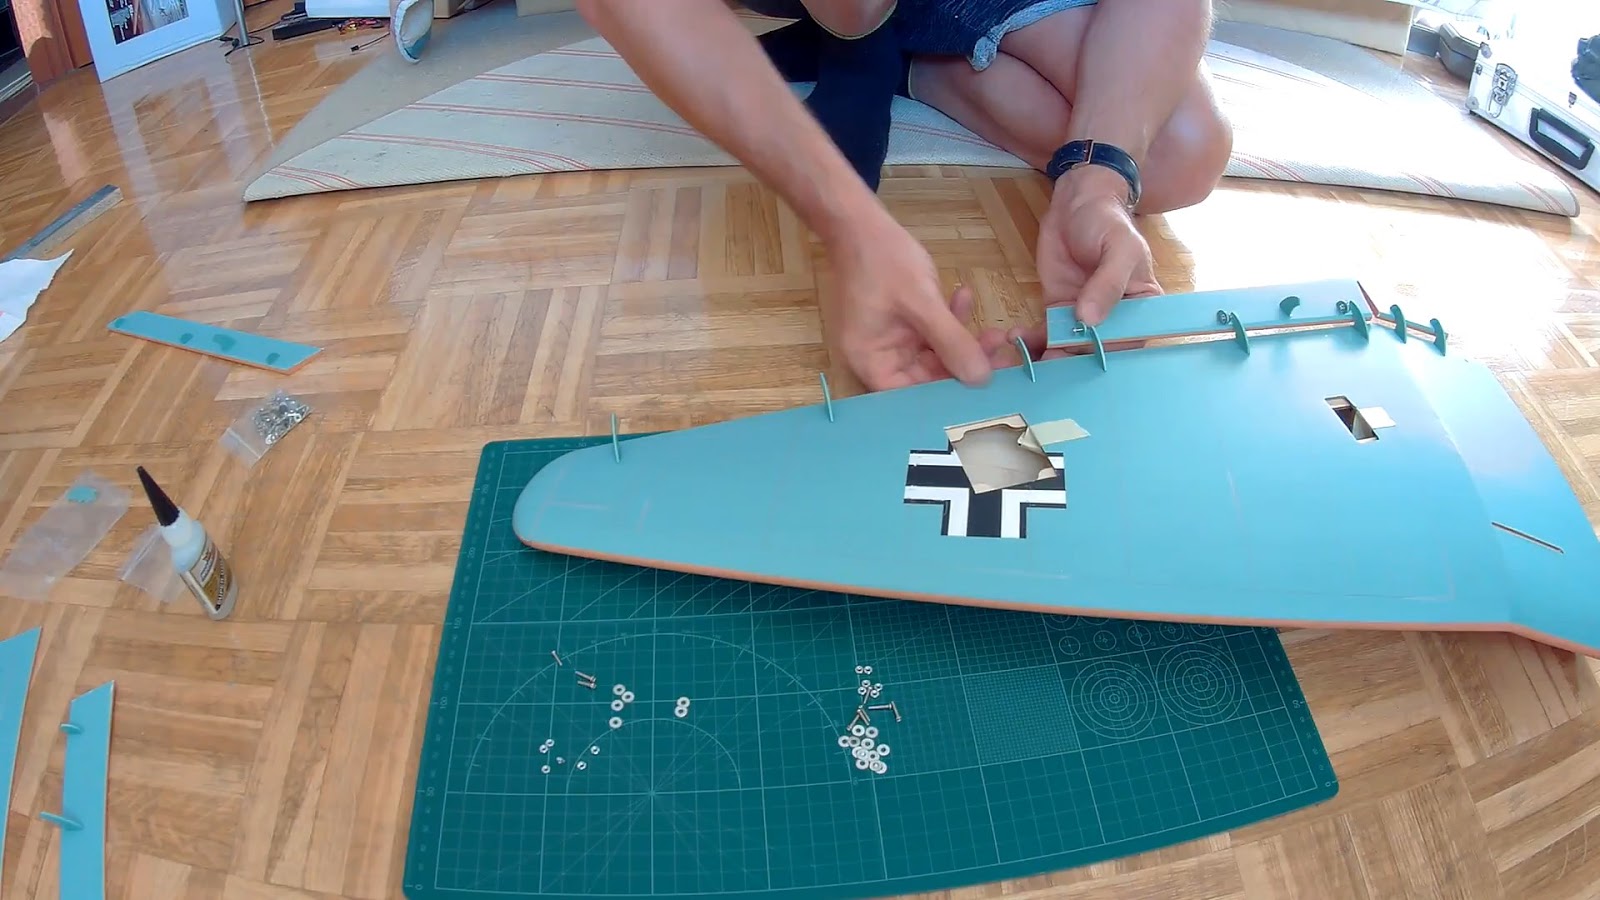
First is the wing, I would suggest you that you read manual very carefuly, count those hinges, they are different for flaps and ailerons. Also, be careful with static flaps, flaps and ailerons since there is left and right side ones.
Test fit everything before gluing.
Hinges are glued with CA glue. Each slot is cut for particular hinge type, but as said before, test fit hinges before gluing them.
Control surface hinges are all the same and you can't miss there.
When glue dries, mount control surfaces to hinges using M2 macnine screws provided. Use loctite on your bolts and don't tight too much those bolts, control surfaces need to move easily.
I would suggest that at this time you insert servo extension leads in both wings and fix them with some masking tape.
Mounting landing gears is easy, I used 5 min epoxy for wooden blocks that come into landing gear cowling (manual says use CA, it's up to you).
Prepare all the screws needed and mark position for them. Landing gear struts fit easy into the wing.
Again, manual says that you should use CA glue to close landing gear hatches, but this time I used just some piece of tape in case that I would need to open them.
If you haven't inserted servo extension leads before, do it now.
Glue main wing together with epoxy glue and let it dry.
Fuselage is much easier to assemble, just be careful to insert elevator control first, then horizontal stabiliser through fuselage slot.
I used 5 minute epoxy for gluing horizontal stabiliser.
Insert CA hinges and connect elevator control surface and glue it witg CA glue.
Rudder control is also easy one, first glue with CA tail wheel landing strut (check fit before doing that) and then using CA hinges glue the rudder to the vertical stabiliser and screw tail wheel bracket to the fuselage.
Horizontal stabiliser support is glued to the fuselage (you need to measure and cut the slot with hobby knife) and screwed to the stabiliser.
Slide the push rods for elevator and rudder and screw ball link clevis on them. Connect clevis to the control horns with M2 machine screws and secure with loctite.
Mount main wing on the fuselage with provided screws.
There is one last thing to do, bottom wing cover that is made of very fragile plastic. You need to cut that plastic with hobby knife at marked lines that are barely visible and glue it with CA to the wing.
Again, I didn't use CA but just standard transparent tape.
And that is it. Now you can install electronics of your choice.
My setup:
Motor: RCTimer BC3548-6 790KV Outrunner Brushless Motor
ESC: HobbyKing 60A ESC 4A UBEC
Servos: Corona DS329MG Digital Metal Gear Servo 3.8kg / 0.11sec / 32g
Propeller: 11x7 wooden propeller
Battery: 4S 4000 mAh LiPo
With this setup I have around 10 minutes of flight.
Maiden Flight
Nothing to say, everything is in the video
I just got AKK CA20 camera and TS5823 VTX at a unbelievable price (camera is 20$ and VTX 10$).
My expectations for such low cost camera was not big, but this little thing surprised me with OSD and bunch of features (some of them I still do not understand well). With the camera you also receive a bunch of connecting cables and one with small controller for setting the camera features (a lot of them)-
Manual is really basic, and that is the only minus for this product. I would love to see better manual with explanation of all features that camera provides.
Lightweight camera (12.4 grams only) can operate from 5V up to 22V (so you can take power even from your receiver) and has an excellent picture and nice colors . It is 600 TVL NTSC standard and manufacturer claims that there is 1/3" SONY SUPER HAD II CCD,Nextchip 2040 DSP in it. According to quality of picture, it sure is. Link to product: https://www.akktek.com/products/cameras/akk-ca20.html?acc=43ec517d68b6edd3015b3edc9a11367b TS5828 VTX
This is 32 channel VTX (quite enough for my needs, but if that is not enough for you they have 40 CH versions) and 600 mW output comes with standard stick antenna and a bunch of connection cables. one of which is for connecting sports and action cameras (like Mobius). Only 7.1 grams and with operating voltage from 7V up to 24V it will suite all of your needs. VTX is suitable for video and audio transmission-
This is a third version of Orange receivers which support telemetry data. First version was very bad , I could get telemetry data only up to 15 meters from me while flying my airplane.
Soon they released V2 of telemetry receivers claiming that telemetry data range is up to 500 meters. Well, I bought that one too. Telemetry range was improved but not as claimed. I could get maximum of 80 to 100 meters of telemetry data.
I have to point out that receiving signal range for control of the aircraft never was an issue either in V1 or V2 telemetry receivers, only telemetry data range.
This one is, so called, Long Range receiver, with control range up to 3.5 kilometres and telemetry data range up to 1 kilometre, at least that is what specification says.
And here is Part 1 of review. Unfortunately, at this time there is only 12 channel receiver available , either with S.BUS or CPPM output. I hope that if this performs well, HobbyKing will make 6, 7, 8 and 9 channell versions.
When I first saw video on FliteTest about building this airplane and that it doesn't have any "hard" wing spar e.g. carbon rod or wooden spar, I was a little skeptic.
Then, friend of mine made one, and when I saw how it flies, I was suprised .
The other thing that amazed me is using a hot glue. I never used hot glue before for building depron airplanes, I used mostly UhuPor and 5 minute epoxy.
So I have decided to make one and give it a try.
After printing PDF plans and transfering parts to depron board I realized that this one will be finished very quickly.
As I saw on FliteTest page that there are couple of variations for canopy, I have decided to make Ripslinger version.
You can't find cardboard in my county, so those parts are just plain paper with printed colour on InkJet printer and then covered with transparent self adhesive film.
Rest of the model is not painted, but covered with covering film (like balsa airplanes). That was my idea to use covering film on depron, and it showed to be good choice, it gives more stiffness to the wings and the fuselage.
Final product looks like this:
I can recommend this design to any RC pilot, beginner or experienced, it is excellent design and awesome flyer.It is quite stable on windy days, and can perform aerobatic maneuvers as well as it can be perfect trainer.
I am using 3S 2200 mAh Battery which gives me around 8-10 minutes of flight.
H-King Composite North American P-51D MUSTANG 1200mm (47")
Well, I just love warbirds, there are couple of them in my hangar, all of them are foam models.
When this nice airplane was announced , I just said to myself that I've got to have it.
To say the truth, it is not cheap plane, you need to purchase all electronics, ESC, servos, motor, propeller, battery and have your own radio and receiver. It comes with servoless retract gears which is nice surprise. But it surprised me how well built the model itself is.
Starting from the fuselage, which is made of composite material and painted extremely nice, with all possible details, over to wings and control surfaces. One minor issue is that on some spots on the wing you will need a little ironining, but that is no big deal.
Unboxing:
Assembly
Getting it ready for flight takes some time, at least 2-3 full afternoons of work if you want to do everything right. Installation of servos take time, because you have to prepare servo mounts and glue them, glue CA hinges (yes all control surfaces are hinged with CA hinges) and do a little drilling and adjusting. And there is additional work to do, install servoless retracts which came with the kit. This is a kit which requires some knowledge about building airplane models.
Servos used for wings are Corona 929MG, you can fin them on HobbyKing.
Fuselage
Since fuselage is in one piece, there is not much to do except install servos, glue horizontal stabilizer and hinge control surfaces, but it also takes a lot of time. Of course, like on the wings, after gluing everything together, you still need to mount control horns and use supplied push rods to connect it with servo arms.
Now, after that you can install motor on provided motor mount. I had to use all spacers provided plus added some washers to set correct distance for propeller.
Suggested NTM Prop Drive 3548 1100kv which I used is worst choice possible. I only did maiden flight with that motor, and replaced it immediately, very poor quality motor which produces a lot vibrations. Here is video about that poor motor:
Don't buy it, better solution is Turnigy D3548/4 1100KV which I use now and can also be found on HobbyKing. Used propeller for this setup with 60A ESC is 11x6 carbon prop. I am flying it with 2200mAh 3S battery around 4 minutes, and with 3300mAh 3S battery around 6-7 minutes.
Servos used in fuselage are HK15148B Digital Servo also available from HobbyKing. Last part is canopy, it takes some time to cut canopy on marked line, I didn't glue the canopy but used 4 self tapping screws to fix it to fuselage
Maiden flight
I was alone at the field for maiden flight so all I could record is from onboard cam and static cam on the ground. But after one week friend of mine helped me with second flight, so I will put that video instead of maiden.
And what to say about this model ? It is sports scale model , so prepare that it is quite fast, not like foam models, but extremely stable and acrobatic. Build quality is excellent and I can suggest it to all warbird lovers.
If you like my videos, please like, share and subscribe, that will give me best motivation to do this kind of videos more.